Built In Indoor Grills Maintenance Tips
Built-in indoor grills need routine grease removal, surface cleaning, and safety checks. Clean removable parts after cooking, inspect vents and seals, and follow the grill maker's instructions for fixed electrical or ventilation parts.
On this page (8 sections)
- How often should you clean a built-in indoor grill?
- What should you clean after every cooking session?
- How do you clean grates without damaging fixed parts?
- Can you use oven and grill cleaner on a built-in grill?
- What should you inspect besides the cooking surface?
- How do you control smoke and grease?
- When should you stop using a built-in indoor grill?
- What is the simplest maintenance routine?
Built-in indoor grills need regular grease removal, surface cleaning, and safety inspections because fixed parts are harder to reach than those on a portable grill.
That access issue shapes the whole routine. You cannot simply lift the grill, turn it over, and rinse away residue in a sink.
Clean the cooking area after use, empty the grease collection system, and keep vents and electrical parts dry.
These steps sound simple, but the fixed installation makes each one more careful. Grease can slip behind edges, collect under a tray, or settle on a counter that sits close to the cooking surface.
Permanent installation changes the routine, not the basic goal. You still remove food residue and grease, but you must also protect the cabinet, counters, ventilation path, controls, and connections around the grill.
That wider view suits households that cook often and want steady results without constant repair. It also suits smaller spaces where smoke, splashes, and lingering odors are noticed more quickly.
A portable grill often allows you to move the entire unit to a sink or outdoor area. A built in model keeps you in place, so the method has to work with damp cloths, removable trays, and approved tools.
Think about who uses the grill as well. Shared kitchens, rental homes, and homes with children all benefit from a routine that avoids excess water, harsh scrubbing, and reach near hot or electrical parts.
The aim is not deeper cleaning for its own sake. The aim is a grill that heats evenly, produces less smoke, and stays safe to use between professional service visits.
Start with small habits after each session, then add inspections and deeper cleaning on a planned schedule. That order keeps residue from hardening while giving fixed parts the protection they need.
How often should you clean a built-in indoor grill?
Wipe the cooking surface after every use, and deep clean when residue or smoke starts to build. A fixed grill should also receive a planned inspection because grease can collect around edges that are hidden by the installation.
Let the grill cool according to its instructions before wiping it. Remove loose food with a suitable tool, then clean the grate, plate, tray, lid, and nearby surfaces that the manual allows you to reach.
A quick wipe prevents fresh residue from hardening into carbon. For a broader routine, follow this guide to how to clean a grill, then adapt the steps to the parts your built-in model permits you to remove.
What should you clean after every cooking session?
Clean the cooking surface, grease tray, splash areas, and accessible edges after each session. These areas collect the oil and food particles most likely to create smoke during the next use.
Remove the tray only when the grill is cool enough to handle. Empty grease into a suitable container instead of pouring it into a sink, where it can cool and block the drain.
Use a soft cloth or approved non-abrasive tool on fixed surfaces. Avoid flooding the grill with water, especially near controls, heating elements, fans, seams, and electrical openings.
Which cleaner helps with baked-on grease?
The right cleaner depends on the surface, the buildup, and the grill's instructions. Read the product directions and the appliance manual together before applying any degreaser.
Diversey Break-Up Oven & Grill Cleaner is a 19 oz aerosol with clinging foam for baked-on grease, grime, carbon, and food soils. It is designed for ovens, grills, broilers, vent hoods, fryers, and griddles, and its stated surface range includes stainless steel, porcelain enamel, iron, ceramic tile, concrete, and glass when used as directed.
Its aerosol format can help cover vertical or hard-to-reach areas, but that also makes overspray control important in a permanently installed kitchen. Protect nearby counters and cabinets, keep the spray away from controls and openings, and wipe the treated area fully.
See our guide to the best indoor grill cleaner for more ways to match a cleaner to the surface and type of buildup.
How do you clean grates without damaging fixed parts?
Use light pressure and keep moisture controlled around the grill body. A built-in unit may have a removable grate, but the housing, heating system, and surrounding counter usually stay in place.
A bristle-free brush can help lift residue from grate openings when the grill is cool or when the tool's instructions call for steam from a heated grill. Do not force a brush into gaps that lead toward wiring, fans, or heating components.
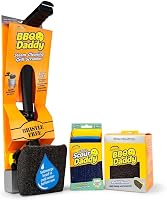
The Scrub Daddy BBQ Daddy Grill Cleaner Kit includes a bristle-free grill brush, a refill brush head, 2 Steel Scour Daddy grill sponges, and a built-in grill scraper. Its materials include ArmorTec steel mesh and FlexTexture polymer foam, and the kit is described for grill cleaning.
The scraper can help with cooked-on buildup, while the scour sponges suit tougher residue on approved grill surfaces. Use a small area first and stop if the surface shows scratching, coating damage, or another change.
For appliance-specific steps, compare how to clean a Ninja Foodi Grill and how to clean a George Foreman Grill. Their removable parts and cleaning limits may differ from a permanently installed model.
Can you use oven and grill cleaner on a built-in grill?
Use an oven and grill cleaner only on surfaces approved by both the appliance instructions and the cleaner directions. Never assume that a product suitable for a loose grate is safe for a fixed heating assembly or control panel.
Zep Heavy-Duty Oven and Grill Cleaner comes as a case of 2, with each container holding 19 oz. Its thick foam is designed to cling and dissolve grease on contact, and its stated uses include stainless steel, porcelain, ceramic, ovens, grills, pots, pans, rotisseries, and burner drip pans.
Use the product only after disconnecting power as directed and allowing the grill to cool. Cover nearby surfaces, avoid spraying into openings, and remove all cleaner residue before the grill is used again.
Do not mix cleaners. If you are unsure whether a grate coating, stone, seal, or fixed surface can tolerate a degreaser, use the appliance manual's approved method instead.
What should you inspect besides the cooking surface?
Inspect grease control, ventilation, seals, controls, and visible connections as part of routine care. Cleaning removes residue, but it does not repair damaged parts or solve a ventilation fault.
Check the grease tray for cracks, warping, or a poor fit. A tray that does not sit correctly can allow grease to spread beneath the cooking area or into spaces that are difficult to reach.
Look at the vent path and surrounding filter or hood area if your installation has one. Grease on a vent surface can reduce airflow and add smoke, so clean accessible parts according to their instructions.
Inspect seals, handles, knobs, and visible fasteners for looseness or damage. Keep the grill's controls dry and do not remove covers that protect electrical components unless the manual specifically explains that service.
How do you control smoke and grease?
Reduce smoke by removing old grease and keeping the ventilation path clear. Fresh oil, fatty foods, and residue near a heating element can all create smoke even when the grill itself is working normally.
Use only the amount of oil needed for the food. Wipe spills before the next cooking session, and empty the grease collection area before it becomes full.
A “smokeless” label does not mean an indoor grill produces no smoke in every situation. Read what smokeless means on an indoor grill and keep the ventilation system operating as instructed.
It also helps to understand how indoor electric grills work before cleaning around heaters, temperature sensors, fans, or other fixed parts. Understanding which components get hot helps you choose safer cleaning times and tools.
When should you stop using a built-in indoor grill?
Stop using the grill if you see damaged wiring, sparking, cracked heat-resistant parts, or smoke that continues after cleaning.
Unusual smells, repeated tripping, or controls that do not respond also need attention before another cooking session.
Those signs point beyond normal maintenance. They suggest that a fixed part may be damaged, loose, or overheating in a way that cleaning cannot correct.
Do not pour water into the grill to cool it. Water can reach heating elements, controls, fans, or wiring and make a small fault more serious.
Disconnect power only as the manual directs, keep the area clear, and contact the manufacturer or a qualified service professional when the problem involves fixed electrical or heating components.
Note what you observed before you call. Record when the fault occurred, whether it involved heat or moisture, and whether any parts looked cracked, warped, or discolored.
Cleaning products cannot correct a failed fan, damaged seal, loose connection, or faulty temperature control. Treat those problems as service issues rather than adding stronger chemicals.
Resist the urge to test the grill again with a short cooking session. A brief test can produce the same fault and turn a service call into a larger safety concern.
Keep the grill off the normal cooking schedule until the cause is known. That pause protects the kitchen, the surrounding cabinetry, and anyone who uses the space.
What is the simplest maintenance routine?
Wipe after each use, empty grease before it collects, deep clean approved removable parts, and inspect the fixed installation regularly. This routine controls the residue most likely to cause smoke while reducing the need for aggressive scrubbing.
Choose Diversey when you need a 19 oz foaming cleaner for approved surfaces and heavy grease. Choose Scrub Daddy when a bristle-free brush, scraper, refill head, and scour sponges fit your cleaning method, or choose Zep when two 19 oz containers suit repeated degreasing of approved stainless steel, porcelain, or ceramic parts.
The final decision is always the grill manual's surface and safety guidance. If a part cannot be removed, sprayed, or soaked safely, clean around it with a controlled damp cloth and leave electrical or damaged components to qualified service.
Frequently asked questions
How often should you clean a built-in indoor grill?
Wipe cooking surfaces after each use once they are safe to handle, then inspect the grease tray and surrounding surfaces regularly. Deep clean when residue remains after normal wiping, smoke increases, or grease begins collecting around vents and fixed edges.
Can you spray cleaner inside a built-in indoor grill?
Only use a cleaner on surfaces approved by the grill instructions, and keep spray away from heating elements, controls, wiring, fans, and electrical openings. Remove power first, allow the grill to cool, and wipe away all residue before reconnecting it.
How do you reduce smoke from a built-in indoor grill?
Remove grease from the cooking surface, grease tray, drip path, and nearby vent area. Check that the ventilation system is clear and working, and avoid adding more oil than the food needs because fresh grease can smoke when it reaches the heating area.
What should you inspect on a built-in indoor grill?
Check the cooking surface, tray, seals, controls, power cord or connection, ventilation path, and visible fasteners for damage or buildup. Stop using the grill if you see damaged wiring, cracked parts, unusual sparking, or smoke that cleaning does not solve.