How to Choose a Toaster Oven Replacement Tray
Choose a toaster oven replacement tray by purpose, exact dimensions and rack fit. Measure the old tray and the oven cavity before ordering, then confirm the replacement supports the food and heat level you plan to use.
On this page (10 sections)
- What type of toaster oven replacement tray do you need?
- How do you measure a toaster oven replacement tray?
- Which dimensions matter most?
- What should a toaster oven drip pan do?
- Which material is best for a replacement tray?
- How do these toaster ovens handle tray choices?
- How do you match a replacement tray to a small oven?
- How should you use and care for the new tray?
- What should you check before ordering?
- Final decision: which toaster oven replacement tray should you choose?
A toaster oven replacement tray should match the oven's purpose, interior measurements and rack position. Measure the old part and the oven cavity before ordering, then check that the replacement leaves space for the door, heating elements and airflow.
A tray can look close enough and still fail to slide into the guides. The key measurements are the usable length, usable width and depth, not only the outside dimensions of the toaster oven.
What type of toaster oven replacement tray do you need?
The right toaster oven replacement tray depends on what the original part does. A baking pan holds food, a broiling rack supports food above a pan, a crumb tray catches crumbs, and a drip pan collects liquid or grease.
Identify the part before measuring it:
| Part | Main job | Common shape |
|---|---|---|
| Baking pan | Holds food while it bakes or reheats | Flat pan with raised edges |
| Broiling rack | Holds food above a pan | Wire or perforated rack |
| Crumb tray | Collects crumbs below the rack | Shallow removable tray |
| Drip pan | Catches liquid or grease | Shallow pan, sometimes below a rack |
| Oven rack | Supports pans and dishes | Wire rack with side supports |
A baking pan is usually the best choice for toast toppings, small baked dishes and reheating food. A broiling rack makes more sense when you need food raised above a pan.
Don't assume that a crumb tray can replace a baking pan. It may be too shallow for food, may sit in a different location and may not have the same clearance from the heating elements.
If crumbs are the main problem, compare our guide to the best toaster oven crumb tray replacement options. If you need several parts, our guide to Best Toaster Oven Replacement Parts can help you sort the part names first.
How do you measure a toaster oven replacement tray?
Measure the old tray first, then measure the oven's interior guides to confirm the replacement will fit. Record the length, width, depth and edge shape in inches.
Follow these steps:
- Remove the tray from the oven and clean loose crumbs from its edges.
- Measure the tray from its widest usable points.
- Measure the depth from the bottom surface to the top of the rim.
- Check whether the tray has turned-down edges, side tabs, handles or a raised lip.
- Measure the distance between the oven's rack guides.
- Check the clearance above the tray and below the upper heating elements.
- Confirm that the door closes without touching the tray.
Measure the old tray in more than one place if it is bent. A warped tray can give you a misleading width, especially near the corners.
For a small toaster oven replacement tray, the interior measurement matters more than the cabinet's advertised outside size. A compact oven may have a square tray area, a narrow rack opening or a particular guide height that limits replacements.
Write down the measurements before searching. A simple note such as “10 in wide, 9 in deep, shallow rim, lower guide” is more useful than the oven's general name alone.
Which dimensions matter most?
The width and depth determine whether the tray slides in, while the depth and rim height affect food clearance. A tray that is only slightly too wide may catch on the guides or prevent the door from closing.
Check these dimensions in order:
- Overall width: The tray must fit between the side guides.
- Overall depth: The tray must clear the back wall and door area.
- Usable depth: Food needs to sit below the upper heating elements.
- Rim height: A tall edge can reduce the space above the food.
- Guide position: The tray may fit on one rack level but not another.
- Corner shape: Rounded or angled corners can affect the fit.
- Handle clearance: A fixed handle can prevent the door from closing.
Do not measure only the flat center of the tray. Include the widest point of the rim, side tabs and any rails that rest on the guides.
Also measure the oven cavity with the door fully open. Some dropdown doors change the available loading angle, even when the tray itself fits inside.
What should a toaster oven drip pan do?
A toaster oven drip pan should catch liquid, grease or crumbs below the food without touching the heating elements. Its job is containment, not necessarily cooking.
Use a shallow pan when you want to catch drips from food placed on a rack. Keep enough space around the pan for it to slide out for cleaning.
A drip pan can help protect the oven floor, but it does not remove the need to clean spills promptly. Grease and food residue can smoke when heated again.
Check whether your oven uses a separate drip pan or a combined crumb tray. The original part's position is a useful clue.
A tray under the rack may catch crumbs, while a pan used under a broiling rack may collect drips.
For comparison, see What Does a Water-filled Drip Tray Do in an Indoor Grill? Water-filled grill trays and toaster oven trays serve different appliance designs, so don't swap them based only on a similar shape.
Which material is best for a replacement tray?
Choose a tray material that suits the oven's heat and your cleaning routine. Metal trays are common for baking and roasting, while coated trays may be easier to clean but need gentler care.
Look for these practical differences:
- Stainless steel is durable and resists rust when cared for properly.
- Aluminum is light and heats quickly, but it can bend more easily.
- Enamel-coated metal offers a smooth cooking surface.
- Nonstick coatings can simplify cleanup but may need non-abrasive tools.
- Wire racks allow heat to reach more of the food's surface.
- Silicone parts are not a default substitute for a metal tray unless the oven and part instructions allow them.
Avoid a tray with an unknown coating if you cannot confirm that it is intended for oven use. Also avoid materials that can soften, warp or release odors at toaster oven temperatures.
The tray should sit flat. If it rocks, bows upward or touches the oven walls, choose another size or part designed for that appliance.
How do these toaster ovens handle tray choices?
The three examples below show why tray fit depends on the oven's size, interior layout and included parts. They are not interchangeable simply because all three are countertop toaster ovens.
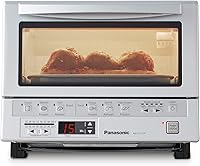
Panasonic FlashXpress: compact tray planning
The Panasonic FlashXpress suits a buyer who needs a compact oven with a removable 9 in inner baking tray and a small footprint. Its stated outside size is 12 in deep by 13 in wide by 10.25 in high, and its included components are a baking pan, crumb tray, toaster oven and wire rack.
The oven has a 0.04 cubic foot capacity and a 250–500°F temperature range. Its double infrared heating and 1300W power support toast, baking, browning and reheating.
For replacement shopping, measure the original 9 in tray and compare its rim and corner shape. The included crumb tray and wire rack are separate parts, so a replacement baking tray should not be chosen by width alone.
The connected baking rack pulls toward you as the dropdown door opens. That makes rack position part of the fit question because a tray must move with the rack without catching on the door or side guides.
Choose this oven when compact size and a smaller tray area match your counter and cooking routine. If you need more interior room, compare the measurements with the larger Breville options below.
Breville BOV650XL: a larger compact oven
The Breville BOV650XL suits shoppers who need a compact smart oven with a 12 x 10 x 4.25 in interior. It has a 0.6 cubic foot capacity, 8 cooking functions and an 1800W preheat system.
Its included components are a 10 x 10 in enamel baking pan and a 10 x 10 in enamel broiling rack. The oven's outside dimensions are 15.5 in deep by 17 in wide by 10.25 in high.
Those measurements show why an oven's inside and outside sizes both matter. A replacement tray may need to match the 10 x 10 in cooking pieces while still clearing the 12 x 10 x 4.25 in interior.
The oven has 3 shelves, a dropdown door, stainless steel material and a nonstick cavity coating. When checking a replacement, compare the tray's rack position with the food clearance available at each shelf.
Choose this model if you want more tray area and 8 cooking functions in a compact countertop oven. It may be less suitable when your counter only has room for a smaller footprint.
Breville BOV450XL: smaller interior, similar functions
The Breville BOV450XL suits a buyer who wants a space-saving oven with 8 cooking functions and an 11 x 10 x 4 in interior. Its outside dimensions are 13.6 in deep by 16 in wide by 8.8 in high.
Its included component is a 10 x 10 in enamel baking pan. The oven also has 3 rack positions, a pull-out crumb tray and automatic shut-off.
Because the interior is smaller than the BOV650XL's, measure the tray and rack clearance carefully. A 10 x 10 in pan may fit the intended rack position, but another tray with taller edges could reduce useful food clearance.
The BOV450XL has a stainless steel body, dropdown door, knob control and 1 shelf. Its 1800W power supports the same broad cooking-function count as the larger Breville example, but the interior dimensions guide tray selection.
Choose it when the smaller cabinet and 11 in pizza capacity fit your space. Compare the exact tray shape before buying a replacement, especially if you need a pan with a raised rim.
How do you match a replacement tray to a small oven?
A small toaster oven replacement tray should match the original loading area, not just the appliance's advertised slice count. Use the old tray, rack guides and door opening as your reference points.
Check these details before ordering:
- Measure the old tray's widest and deepest points.
- Confirm whether it sits on a rack or slides into fixed guides.
- Check the tray's rim height against the upper elements.
- Compare the corner shape and side tabs.
- Confirm whether the tray is a baking pan, crumb tray or drip pan.
- Look for the oven model number near the controls, door or rear label.
- Keep the original part until the replacement fits.
If the old tray is missing, measure between the rack guides and the cavity walls. Leave clearance for the tray to slide in and out without scraping the coating or touching the heating elements.
Don't assume that “small” means universal. Small toaster ovens can have different interior widths, rack positions and tray depths.
How should you use and care for the new tray?
Use the replacement tray only in the position and role it was designed for. Keep food, grease and crumbs away from the heating elements, and remove the tray after the oven cools if it needs cleaning.
General care steps include:
- Wash the tray according to its material and coating.
- Dry it before placing it back in the oven.
- Avoid metal tools on coated surfaces.
- Empty crumbs before they build up near the heating elements.
- Clean grease after the oven has cooled.
- Check for warping, peeling or sharp edges.
- Stop using a tray that touches the door or heating elements.
Do not cover every rack opening with foil unless the appliance instructions allow it. Blocking airflow can change how the oven heats and may create a safety problem.
For other appliance parts, see How to Choose Replacement Toaster Oven Knobs and How to Choose a Replacement Toaster Oven Heating Element. Those parts need their own fit checks and should not be substituted with general-purpose pieces.
What should you check before ordering?
Before ordering a toaster oven replacement tray, confirm the model number, tray purpose, dimensions and rack position. These four checks prevent most fit problems.
Use this final checklist:
- Is the part a baking pan, broiling rack, crumb tray or drip pan?
- Do the length and width match the old part?
- Does the depth leave room above the food?
- Do the corners, tabs and rails match?
- Does the tray fit the correct rack level?
- Will the door close without contact?
- Is the material intended for oven use?
- Can you remove it safely for cleaning?
When you compare products, use the oven's exact model number rather than a broad search for “universal toaster oven tray.” Universal parts can work in some ovens, but the measurements and clearances still decide whether they are suitable.
A matching tray should slide smoothly, sit flat and leave safe space around the food. If any of those checks fail, keep searching for a part made for the oven's dimensions.
Final decision: which toaster oven replacement tray should you choose?
Choose a baking pan for food, a broiling rack for raised cooking, and a crumb or drip tray for cleanup. For any toaster oven replacement tray, match the original part's dimensions, shape and position before you order.
Start with the model number and old tray measurements. Then compare the replacement's width, depth, rim height and material with the oven cavity.
If you are also deciding between appliance sizes, read our toaster oven vs microwave comparison. If you need a different support surface, see the best replacement rack for toaster oven guide.
Frequently asked questions
How do I choose a toaster oven replacement tray?
Choose a toaster oven replacement tray by measuring the original tray's length, width and depth, then compare those measurements with the oven's usable interior. Confirm whether you need a baking pan, broiling rack, crumb tray or drip pan, because these parts have different jobs and may not be interchangeable.
Can I use any tray in a toaster oven?
You should use a tray that fits the oven's rack guides without touching the heating elements, door or interior walls. Check the tray's material and heat rating when available, and leave room for air movement.
A tray that fits the opening may still be too deep or wide for safe use.
Is a toaster oven drip pan the same as a crumb tray?
A toaster oven drip pan catches liquid or grease below food, while a crumb tray collects crumbs and small debris. Some ovens use one removable tray for more than one purpose, but you should match the replacement to the oven's original part shape and position.
How do I measure a small toaster oven tray replacement?
Remove the old tray and measure its usable length, width and depth. Then measure the oven cavity between the guides, not just the outside cabinet.
For a small toaster oven tray replacement, even a small difference can prevent the door from closing or stop the tray from sliding into place.
Should a replacement toaster oven tray have a rim?
A rim helps contain food, crumbs and some liquid, so it suits baking and reheating more than a flat rack. Choose the rim height based on the food you cook and the available interior clearance.
Make sure the rim does not bring food too close to the upper heating elements.